thin finishing nails
The Versatility and Benefits of Thin Finishing Nails
In the world of carpentry and woodworking, the tools and materials we choose can make all the difference in the outcome of a project. Among these, thin finishing nails have emerged as a preferred choice for many professionals and DIY enthusiasts alike. As their name suggests, these nails are designed to be subtle yet effective, allowing for a variety of applications in finishing and trim work. This article will explore the characteristics, advantages, and best practices for using thin finishing nails.
What Are Thin Finishing Nails?
Thin finishing nails are small gauge nails, typically ranging from 15 to 23 gauge, that are used primarily for fastening trim, molding, and other delicate components in woodworking. Their slender design allows them to penetrate materials easily without causing significant damage or splitting, making them ideal for use on softer woods and intricate projects. They often feature a small head, which can be driven into the wood and subsequently concealed, leaving behind a seamless finish.
Advantages of Using Thin Finishing Nails
1. Minimal Visibility One of the primary benefits of thin finishing nails is their minimal visibility. Their small heads and slender bodies ensure that they do not detract from the overall aesthetic of a project. This is particularly crucial in fine woodworking, where appearance is paramount.
2. Reduced Splitting Due to their thin gauge, these nails are less likely to split the wood when driven in, which is a common concern with larger fasteners. This attribute makes them particularly useful for fragile or finely grained woods.
3. Ease of Use Thin finishing nails are typically easy to install, especially when using a nail gun designed for such fasteners. The speed and efficiency of pneumatic nailers allow for quick application, saving time on labor-intensive projects.
thin finishing nails
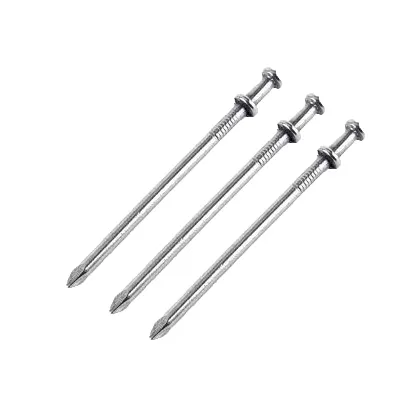
4. Holding Power Despite their small size, thin finishing nails can provide substantial holding power. When correctly installed, they can secure trim and moldings firmly in place, ensuring that components remain stable and intact over time.
5. Versatility These nails can be used across a variety of applications, including attaching baseboards, crown moldings, cabinetry, and even furniture assembly. Their versatility makes them an indispensable tool for carpenters and DIY enthusiasts.
Best Practices for Using Thin Finishing Nails
1. Choose the Right Gauge Depending on the thickness of the materials you plan to connect, select the appropriate gauge of finishing nail. For lighter materials, a 23 gauge nail may suffice, whereas a 15 or 18 gauge may be necessary for heavier trim.
2. Pre-drill for Accuracy For extremely delicate materials, pre-drilling a pilot hole can help guide the nail and reduce the risk of splitting.
3. Use a Nail Gun A pneumatic or battery-operated nail gun is highly recommended for driving thin finishing nails. These tools provide the necessary force without the risk of damaging the material, ensuring a clean and precise application.
4. Fill and Finish After nailing, consider filling the holes with wood filler and sanding smooth to achieve a flawless finish. This step is crucial for maintaining the aesthetic appeal of your project.
In conclusion, thin finishing nails are an essential element in the toolbox of anyone who works with wood. Their ability to provide a secure hold while leaving a discreet mark makes them a favorite for trim work and fine carpentry. By understanding their advantages and following best practices, you can enhance your woodworking projects and achieve professional results with ease.
-
Iron Nails Evolving Sentience in Landfill Ecosystems
NewsAug.22,2025
-
Black Iron Nails: Raw Power, Five-Star Forged
NewsAug.22,2025
-
Wire Mesh: Dingzhou's Industrial Language
NewsAug.22,2025
-
Reflective PVC Coated Wire Mesh Highway Safety
NewsAug.22,2025
-
High Carbon Steel Wire Suspended Desalination Nets
NewsAug.22,2025
-
Steel Wire Sparks: Five-Star's Origin Story
NewsAug.22,2025


